How to Publish a DMARC Record?
Email authentication isn’t simply about verifying senders; it’s about protecting your organization from phishing, spoofing, and other email-based attacks and, most importantly, ensuring that your email campaigns reach their intended recipients. An email authentication protocol that ticks all of these boxes is DMARC, or Domain-based Message Authentication, Reporting, and Conformance.
To get all these benefits of DMARC, you need to create and publish a DMARC record. The DMARC record that you create is published on the DNS and gives instructions on how emails that fail authentication should be treated by the receiving mail servers.
To kick-start your email authentication journey, here’s how you can publish a DMARC record.
What is a DMARC record?
A DMARC record is a TXT record that initiates communication between the sending and receiving email servers. When your email reaches the recipient’s server, DMARC confirms that the email indeed came from an authorized sender and hasn’t been tampered with. It does this by checking if the email passes SPF and DKIM authentication checks.

If an email fails these checks, the DMARC record provides instructions on what to do next. This can include letting the email through, pushing it into the spam folder, or rejecting it altogether.
To determine what happens to your emails that fail SPF and DKIM checks, you can set the DMARC policy to do nothing (p=none), send the email to the spam folder (p=quarantine), or reject the email outright (p=reject). By implementing and adjusting these DMARC policies, you can control and improve your email domain’s security and deliverability.
Here’s what a DMARC record looks like:
v=DMARC1; p=reject; rua=mailto:dmarc@example.com
How to publish a DMARC record?
To publish a DMARC record, you first need to generate it. Once you have your DMARC record ready, follow these steps:
Log in to your DNS management console
Once you have your DMARC record in hand, access your DNS management console, which is provided by the platform where your domain is hosted.
Navigate to your domain
After you have logged in to your DNS console, look for the specific domain that you use to send emails (the one for which you want to set up DMARC). You can find it under the “DNS Management” section or “DNS Settings.”

Specify domain and record details
Under the DNS management section, select “ Add a new DNS record”. Here, set the resource type to TXT, as DMARC records exist as TXT records; for the hostname, enter _dmarc.
Add the DMARC record value
Input the value of your DMARC record that is, the record you generated earlier.
For instance: v=DMARC1; p=reject; rua=mailto:dmarc@example.com
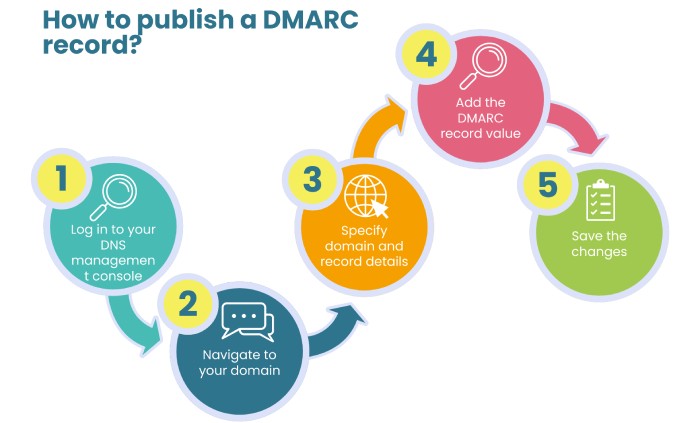
Save the changes
Once you’ve entered the DMARC record, all you’re left to do is save the changes, and you’re done!
Now that your DMARC record is published, the most important thing is to strategically implement security protocols. Remember, a DMARC record with a p=none policy will do you no good! For comprehensive protection against email fraud, shift to DMARC enforcement.
Contact DuoCircle to know more!